Warning: Use of undefined constant title - assumed 'title' (this will throw an Error in a future version of PHP) in /data/www.zhuangjiba.com/web/e/data/tmp/tempnews8.php on line 170
图文演示u盘格式化的方法
装机吧
Warning: Use of undefined constant newstime - assumed 'newstime' (this will throw an Error in a future version of PHP) in /data/www.zhuangjiba.com/web/e/data/tmp/tempnews8.php on line 171
2021年06月16日 11:42:09
u盘是我们工作生活中常用的可移动存储盘,也可以制作成启动盘修复电脑等。不过修复完电脑后,我们需要格式化u盘后重新转化成存储盘使用。那么怎么把u盘格式化呢?下面小编就教下大家把u盘格式化的方法。
具体的步骤如下:
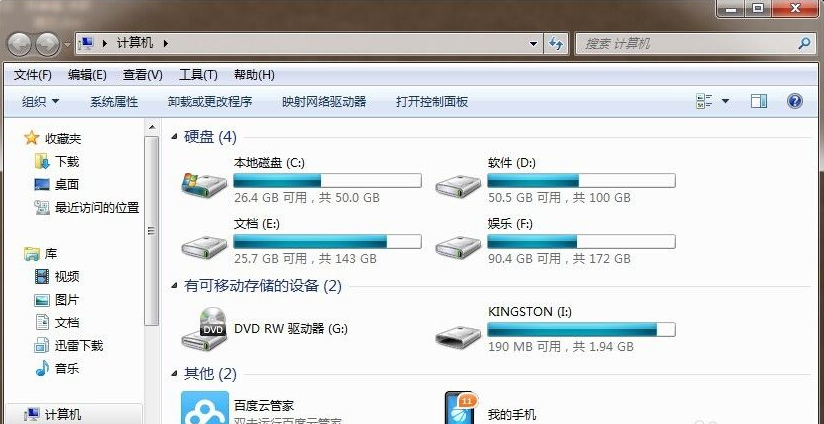
1、首先打开我的电脑,找到可移动存出I盘,格式化之前要备份好U盘数据。
2、然后选中I盘。

3、单击鼠标右键,选择“格式化”选项,单击“格式化”。

4、选择“快速格式化”,单击“开始”然后下一步。

5、提示格式化将删除U盘内所有数据,单击“确定”。

6、再次确定是否要格式化?单击“是”。

7、格式化完毕,单击“确定”打开U盘查看效果。

8、现在可以看到U盘数据被清除了。

以上便是u盘格式化的方法,有不懂的小伙伴可以参照教程去操作哦。
喜欢22


