Warning: Use of undefined constant title - assumed 'title' (this will throw an Error in a future version of PHP) in /data/www.zhuangjiba.com/web/e/data/tmp/tempnews8.php on line 170
戴尔开机f12修复电脑步骤演示
装机吧
Warning: Use of undefined constant newstime - assumed 'newstime' (this will throw an Error in a future version of PHP) in /data/www.zhuangjiba.com/web/e/data/tmp/tempnews8.php on line 171
2022年02月22日 09:22:00
戴尔开机f12修复电脑步骤有哪些?很多用户使用戴尔电脑时出现系统故障问题想要在开机时按f12进行修复,但是却不清楚后续的操心,别担心,接下来,小编就把戴尔开机f12修复电脑步骤分享给大家,我们一起来看看吧。
戴尔开机f12如何修复电脑
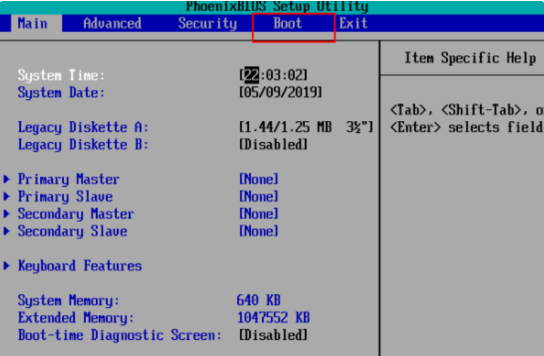
1.首先我们在开机启动页面下按f12进入到bios设置页面,此时我们通过方向键选择“boot”选项。
2.在“boot”选项下我们找到“CD-ROM Drive”。

3.按f10选择提示框中的“yes”。

4.此时我们将电脑重启,进入页面后选择“安装系统到硬盘第一分区”。

5.最后我们只需等待系统重装修复完成即可。

这就是戴尔开机f12修复电脑步骤所在,你学会了吗,赶快去试试吧。
喜欢22


