Warning: Use of undefined constant title - assumed 'title' (this will throw an Error in a future version of PHP) in /data/www.zhuangjiba.com/web/e/data/tmp/tempnews8.php on line 170
电脑u盘启动bios设置-联想电脑bios怎么设置u盘启动
装机吧
Warning: Use of undefined constant newstime - assumed 'newstime' (this will throw an Error in a future version of PHP) in /data/www.zhuangjiba.com/web/e/data/tmp/tempnews8.php on line 171
2022年01月28日 09:50:00

联想电脑是很多小伙伴都在用的,那么在使用联想电脑安装系统的时候,很多小伙伴都不知道联想电脑bios怎么设置u盘启动,下面小编就给大家带来联想电脑bios设置u盘启动的方法。
工具/原料:
系统版本:windows10
品牌型号:联想小新pro14
方法/步骤:
一、联想电脑bios设置u盘启动
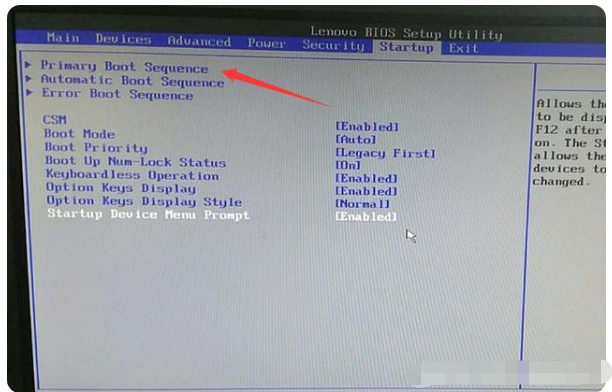
1.启动电脑,当屏幕上出现联想电脑的徽标时,快速按键盘上的F2键进入下一步。
2.进入BIOS界面后,使用键盘上的左右方向键调整到启动选项,然后单击主引导顺序选项进入下一步。
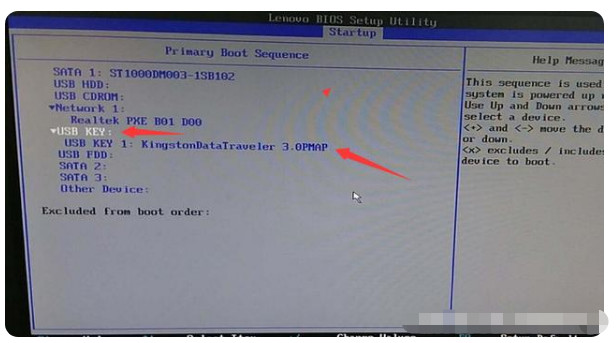
3.通过键盘上的上下键打开USB键选项,然后将USB键1:kingstondatatraveler 3.pmap移到顶部。(也就是说,你自己的U盘)。
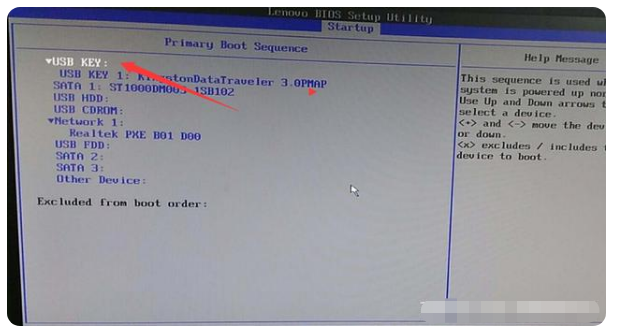
4.操作完成后,通过键盘上的“”或“-”键将USB键选项移到顶部,进入下一步。
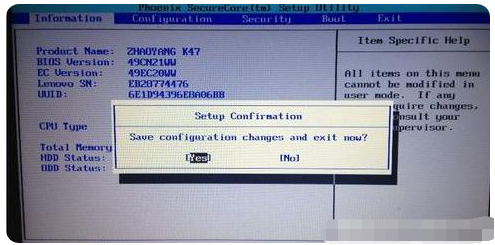
5.最后,按键盘上的F10键保存相关设置。
总结:
以上就是联想电脑bios设置u盘启动的方法,希望能帮助到大家。
喜欢22


