Warning: Use of undefined constant title - assumed 'title' (this will throw an Error in a future version of PHP) in /data/www.zhuangjiba.com/web/e/data/tmp/tempnews8.php on line 170
win10免费自带vpn如何设置
装机吧
Warning: Use of undefined constant newstime - assumed 'newstime' (this will throw an Error in a future version of PHP) in /data/www.zhuangjiba.com/web/e/data/tmp/tempnews8.php on line 171
2021年07月21日 12:40:00
在Windows 10会有需要通过虚拟专用网络连接访问网络的需求,如何在Win10下创建免费的虚拟专用网络连接,下面以Windows 10为例,简述一下win10虚拟专用网络设置方法。
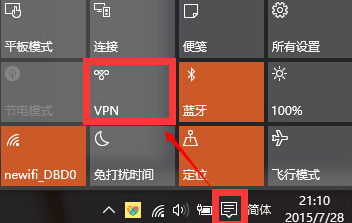
1、单击左下角的通知中心,选择“虚拟专用网络”。
2、接着来到这个界面单击“添加虚拟专用网络连接”。

3、根据要连接的虚拟专用网络要求,依次填写相关项目,填写完毕后点击保存。连接名称,随便写一个,服务器名称或地址。填写我们的公布的IP地址。


4、保存虚拟专用网络连接后,需要连接时,单击要连接的虚拟专用网络,然后点击“连接”按钮,即可进行连接虚拟专用网络。

以上就是win10免费自带虚拟专用网络的设置方法了,希望对大家有帮助。
喜欢22


