Warning: Use of undefined constant title - assumed 'title' (this will throw an Error in a future version of PHP) in /data/www.zhuangjiba.com/web/e/data/tmp/tempnews8.php on line 170
u盘大师制作启动盘的教程
装机吧
Warning: Use of undefined constant newstime - assumed 'newstime' (this will throw an Error in a future version of PHP) in /data/www.zhuangjiba.com/web/e/data/tmp/tempnews8.php on line 171
2022年01月25日 09:50:00
作为一款专业的装机工具,U盘装机大师winpe启动盘u盘版系统制作工具一直以来秉承着成功率和稳定性。近期,有朋友在问要怎么使用U盘大师,所以下面小编就要来跟大家说说u盘大师制作启动盘的教程,大家一起来看看吧。
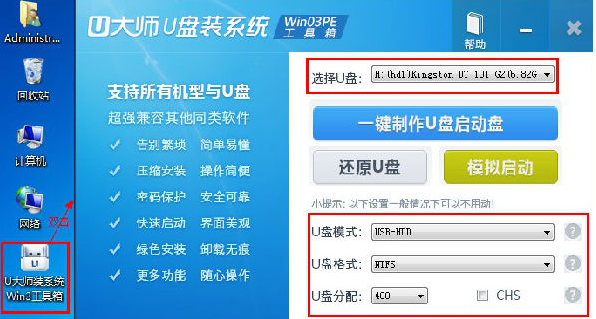
1、插入U盘,备份U盘数据。打开下载好的u大师,选择要制作成启动U盘的盘符,U盘模式,U盘格式。
2、然后点击一键制作U盘启动盘。

3、点击确定。

4、等待U盘格式化。

5、制作完成后,弹出如下窗口,可以直接将其忽略。

6、退出制作工具,打开U盘,就可以看到如下文件。

以上就是u盘大师制作启动盘的教程啦,希望能帮助到大家。
喜欢22


