Warning: Use of undefined constant title - assumed 'title' (this will throw an Error in a future version of PHP) in /data/www.zhuangjiba.com/web/e/data/tmp/tempnews8.php on line 170
分区如何还原-怎么还原分区
装机吧
Warning: Use of undefined constant newstime - assumed 'newstime' (this will throw an Error in a future version of PHP) in /data/www.zhuangjiba.com/web/e/data/tmp/tempnews8.php on line 171
2022年01月16日 10:46:00
分区如何还原?这个问题对于很多小伙伴来说都是不明白的,对于电脑分区来说,有时候还原是非常有必要的,那么u盘分区了怎么还原呢?下面小编就给大家带来怎么还原分区。
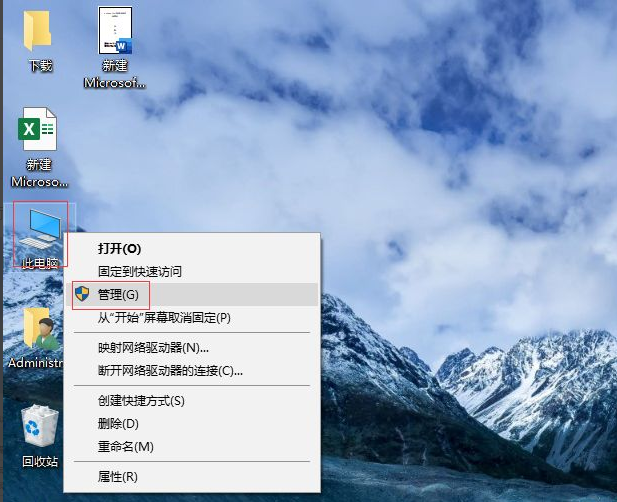
1.进入系统,鼠标右键“此电脑”单击“管理”。
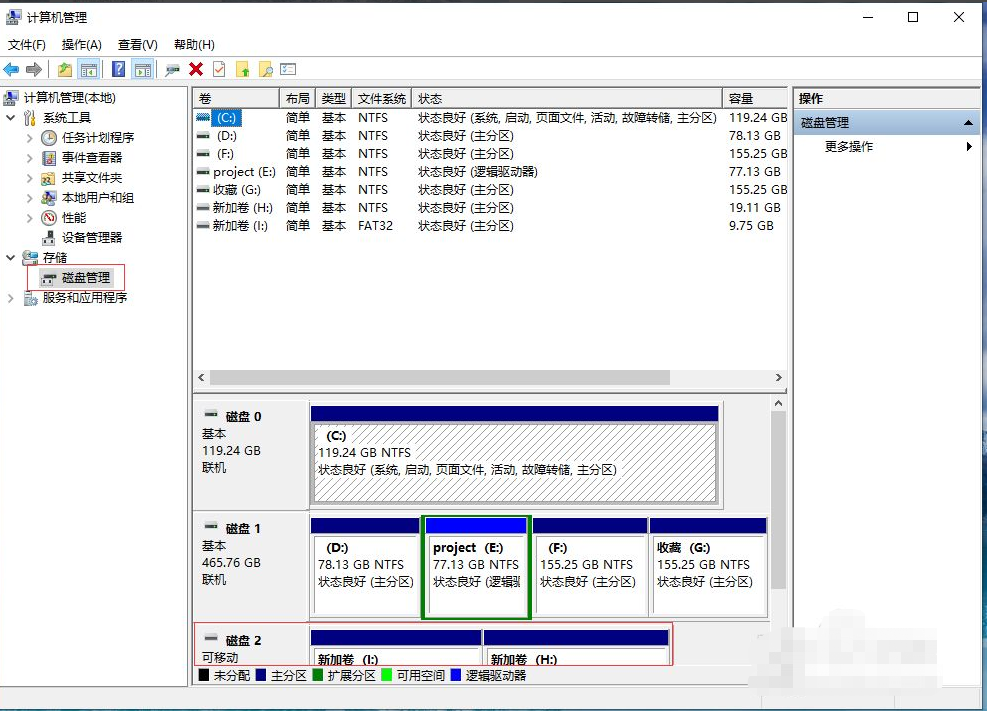
2.打开设备管理器,点击“磁盘管理”可以看到U盘被分为2个区了。
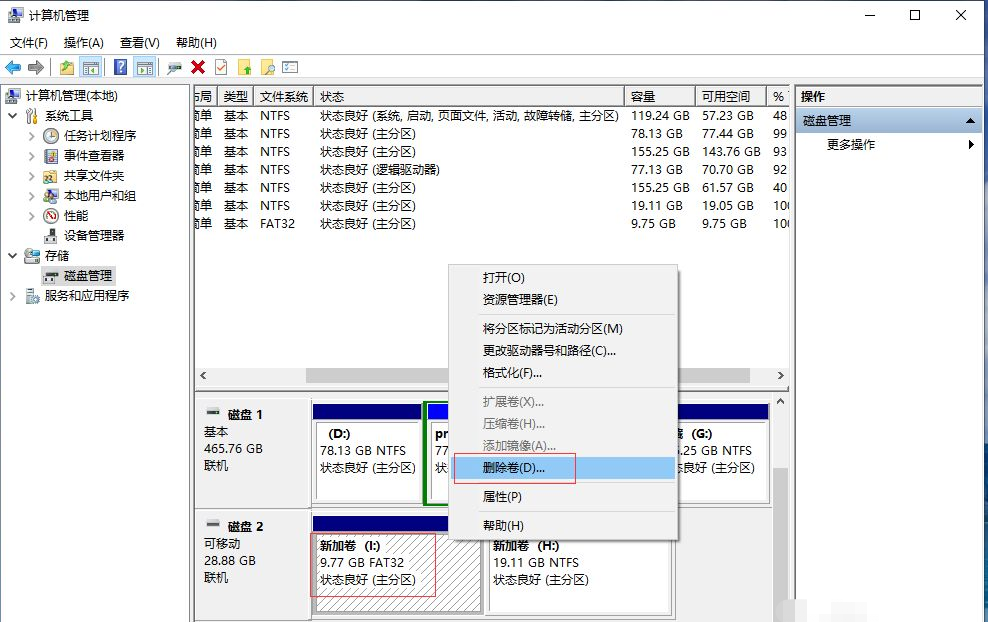
3.分别鼠标右键“I”和“H”卷,单击“删除卷”。
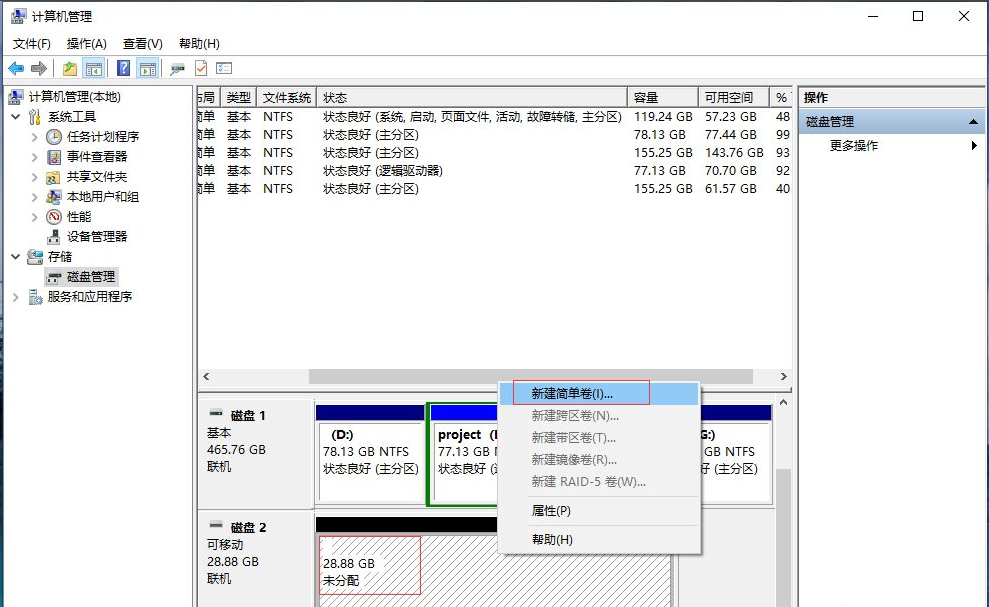
4.这样U盘就变为未分配了,鼠标右键“未分配”单击“新建简单卷”。
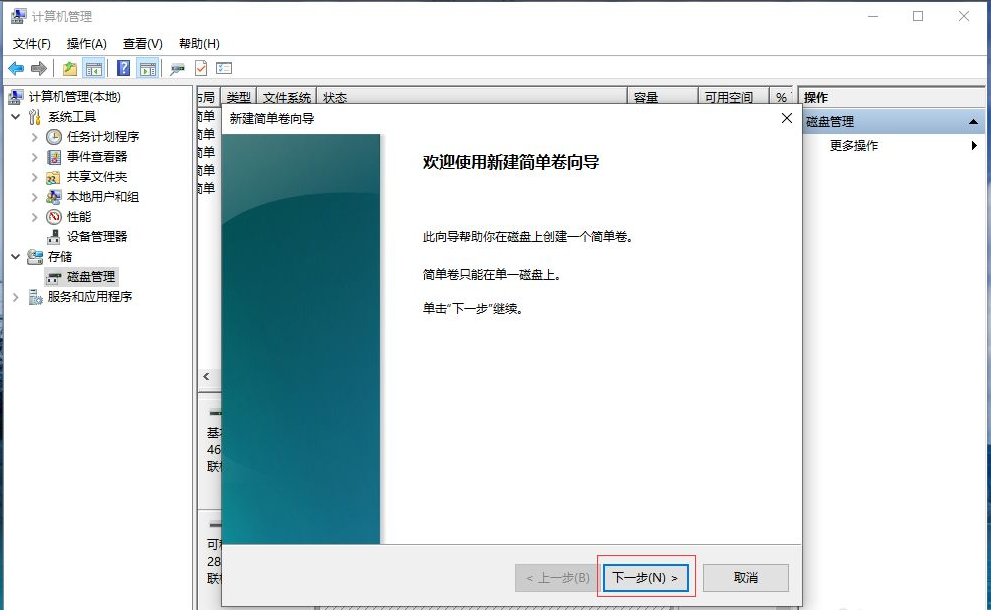
5.弹出“新建简单卷向导”直接点击“下一步”即可。
6.注意文件系统选择“NTFS”点击下一步。

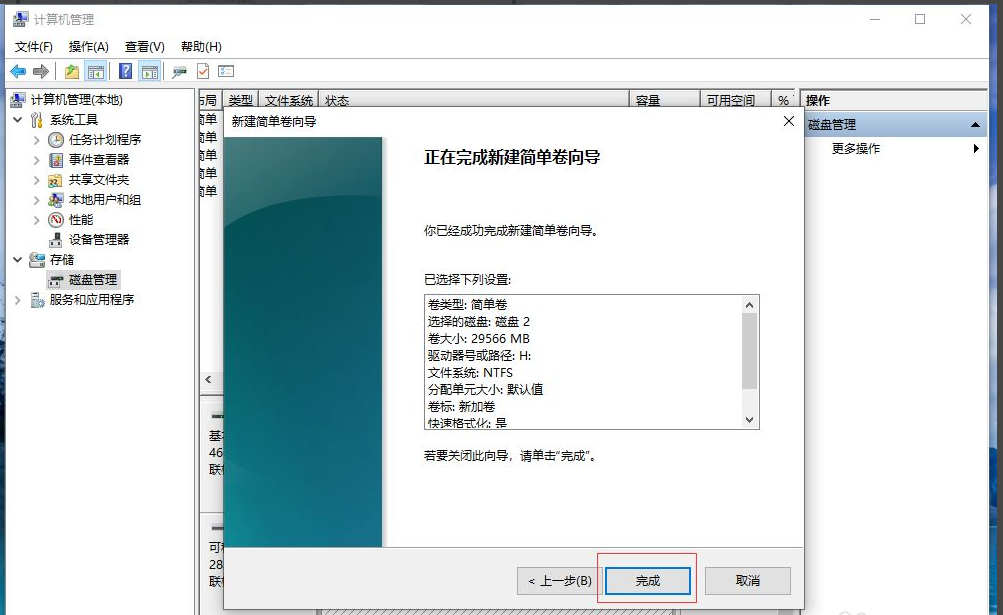
7.点击“完成”关闭“新建简单卷向导”这样u盘分区就合并为一个了。
以上就是u盘分区了怎么还原,希望能帮助到大家。
喜欢22


