Warning: Use of undefined constant title - assumed 'title' (this will throw an Error in a future version of PHP) in /data/www.zhuangjiba.com/web/e/data/tmp/tempnews8.php on line 170
如何制作u盘系统安装盘
装机吧
Warning: Use of undefined constant newstime - assumed 'newstime' (this will throw an Error in a future version of PHP) in /data/www.zhuangjiba.com/web/e/data/tmp/tempnews8.php on line 171
2021年01月25日 13:06:02
有小伙伴说自己的电脑系统崩溃进不去了,不知道该怎么办。这个时候可以通过制作u盘系统安装盘重装系统了。那么如何制作u盘系统安装盘呢?下面小编教下大家u盘启动盘制作方法。
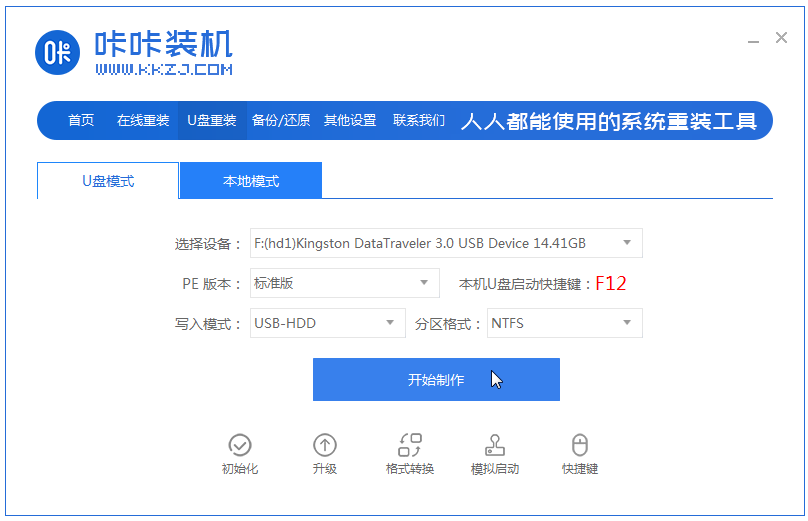
1、打开安装好的咔咔装机一键重装系统工具,准备一个 8GB 以上的空白 U 盘,然后选择u盘模式开始制作启动 U 盘。
2、在制作系统列表中选择您想安装的操作系统。

3、备份好u盘重要资料后,选择确定格式化u盘。

4、当下载完系统之后,将会自动制作U盘启动以及将下载系统和备份的资料导入到U盘里面,在此期间大家耐心等候。

5、等弹出提示U盘已经制作完成了,拔出u盘。(温馨提示 如果出现制作失败,请重新制作失败的U盘)。

6、后面将u盘启动盘插入电脑中,进入u盘启动界面后进入pe,即可进行电脑的修复或者重装系统等操作啦。

以上便是如何制作u盘系统安装盘的方法啦,希望能帮到大家。
喜欢22


