Warning: Use of undefined constant title - assumed 'title' (this will throw an Error in a future version of PHP) in /data/www.zhuangjiba.com/web/e/data/tmp/tempnews8.php on line 170
教你电脑开机如何进入u盘启动模式
装机吧
Warning: Use of undefined constant newstime - assumed 'newstime' (this will throw an Error in a future version of PHP) in /data/www.zhuangjiba.com/web/e/data/tmp/tempnews8.php on line 171
2022年01月21日 12:10:00
U盘,作为我们工作和生活中都经常需要使用的一个设备,除了数据存储转移的功能。其实,我们还可以通过它进行u盘启动完成系统的安装操作,不过大部分用户都不知道在电脑中如何进入u盘启动模式,今天,小编就把开机进入u盘启动模式的步骤教程分享给大家,一起来看看吧。
工具/原料:
系统版本:windows10
品牌型号:微星显卡台式机
方法/步骤:
一、开机如何进入u盘启动
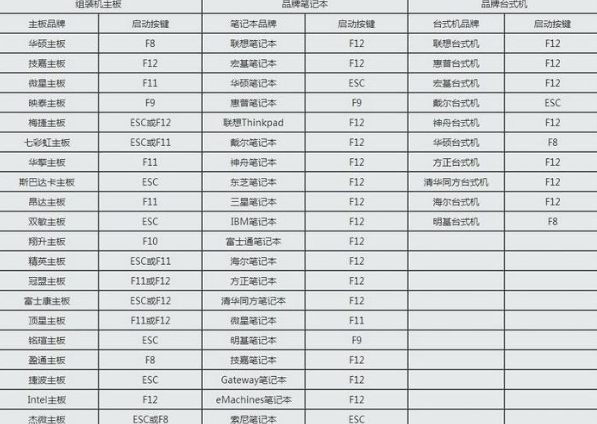
1.首先我们需要将制作好的启动盘插到电脑当中,在开机的页面按下启动热键进入bios。(不同主板的启动热键不同)如图。
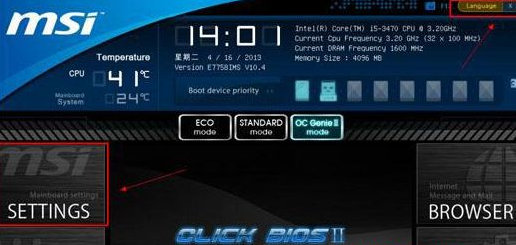
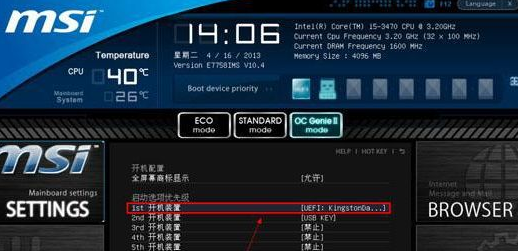
2.进入页面后我们点击右侧将language切换成简体中文模式,选择左侧【settings】设置。
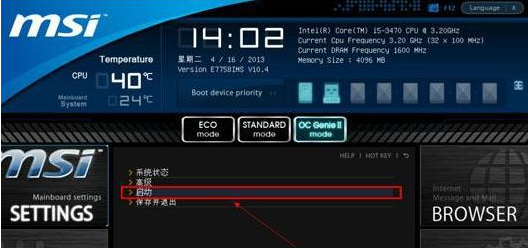
3.选择【启动】进入到子菜单当中。
4.此时我们点击【1st 开机装置】按回车执行操作。
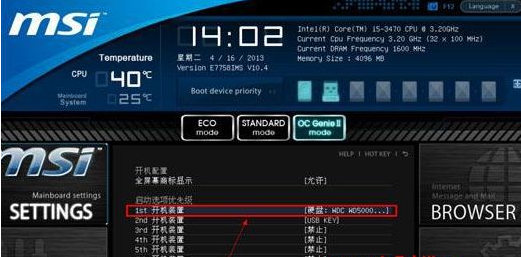
5.在页面中我们移动到电脑上的启动盘,按回车确认。
6.此时我们的u盘启动就设置完成啦,按f10进行保存,最后退出页面重启后就可以进入到u盘启动的状态当中啦。
总结:
这就是开机进入u盘启动模式的步骤教程的所有内容,希望可以给大家提供帮助。
喜欢22


