Warning: Use of undefined constant title - assumed 'title' (this will throw an Error in a future version of PHP) in /data/www.zhuangjiba.com/web/e/data/tmp/tempnews8.php on line 170
win10启动项在哪里设置的教程
装机吧
Warning: Use of undefined constant newstime - assumed 'newstime' (this will throw an Error in a future version of PHP) in /data/www.zhuangjiba.com/web/e/data/tmp/tempnews8.php on line 171
2022年02月21日 11:30:02
启动项就是开机后系统自动加载运行的程序,一些软件设置成开机启动后会更方便我们的使用。但是有的人却不知道怎么设置相关的win10启动项,下面我们就来看看win10启动项在哪里设置的教程,大家一起来看看吧。
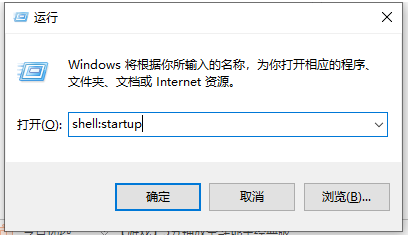
1、按下win+R快捷键,打开运行窗口,输入shell:startup,点击确定
2、打开启动文件夹,最后把想要添加的启动项快捷方式直接拖进这个文件夹(小编以qq为例)如果安装了360就会出现如图提示,不用理他

3、然后就可以看到我们将qq设置为启动项了。

4、我们还可以进入任务管理器中看看我们有没有添加成功。

以上就是win10启动项在哪里设置的教程啦,希望能帮助到大家。
喜欢22


