Warning: Use of undefined constant title - assumed 'title' (this will throw an Error in a future version of PHP) in /data/www.zhuangjiba.com/web/e/data/tmp/tempnews8.php on line 170
详解win10向特定用户共享文件的方法
装机吧
Warning: Use of undefined constant newstime - assumed 'newstime' (this will throw an Error in a future version of PHP) in /data/www.zhuangjiba.com/web/e/data/tmp/tempnews8.php on line 171
2021年03月06日 16:10:00
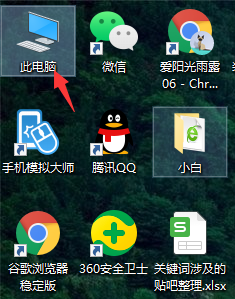
win10系统是可以指定共享资源的访问权限的,有小伙伴需要共享文件给其他的工作伙伴,但是又不想让其他不相关的人接收到。那么win10如何只允许特定用户共享文件?下面教下大家win10向特定用户共享文件的方法。
1、打开桌面的此电脑(文件资源管理器),选择需要共享的文件夹,比如图中的“课程实验”文件夹。

2、鼠标右击"课程实验"文件夹,选择"属性"项。
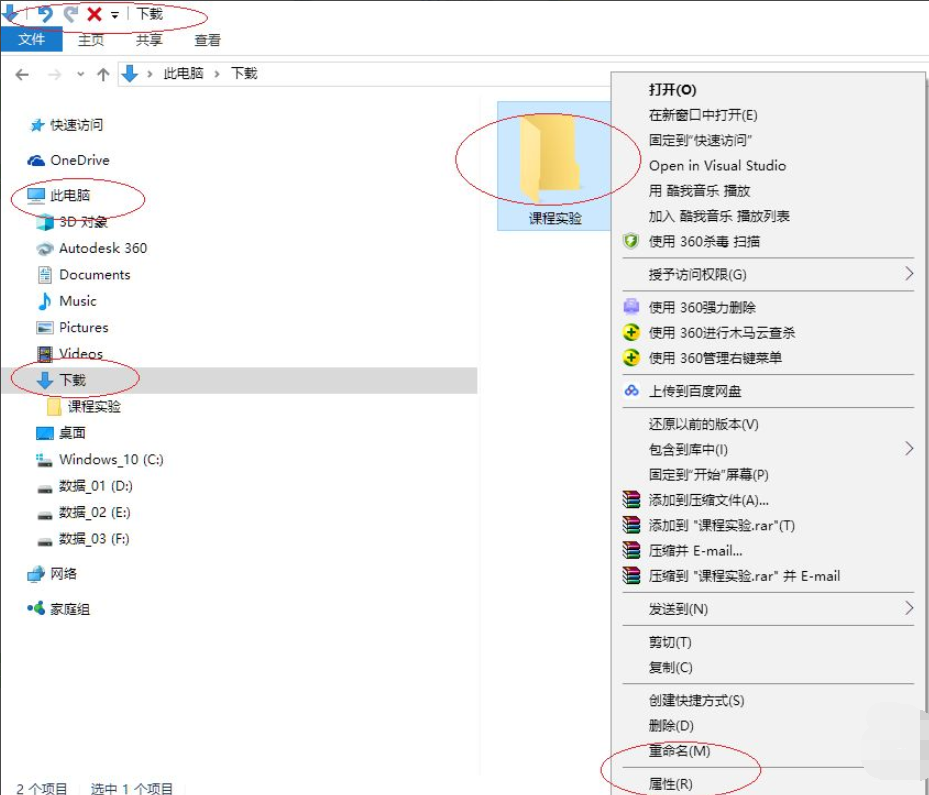
3、点击"共享→网络文件和文件夹共享→共享..."按钮。
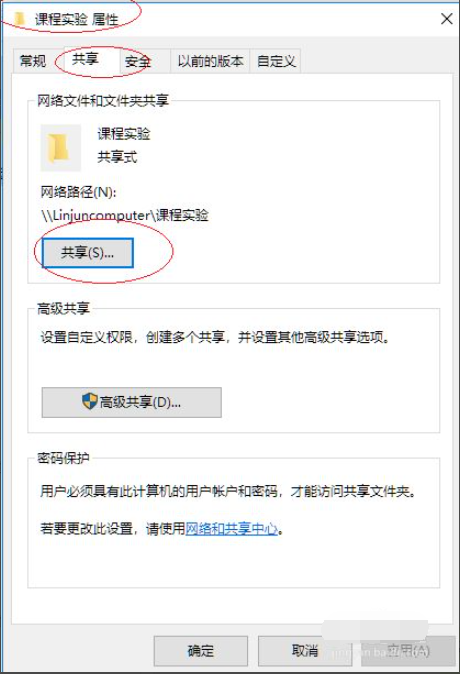
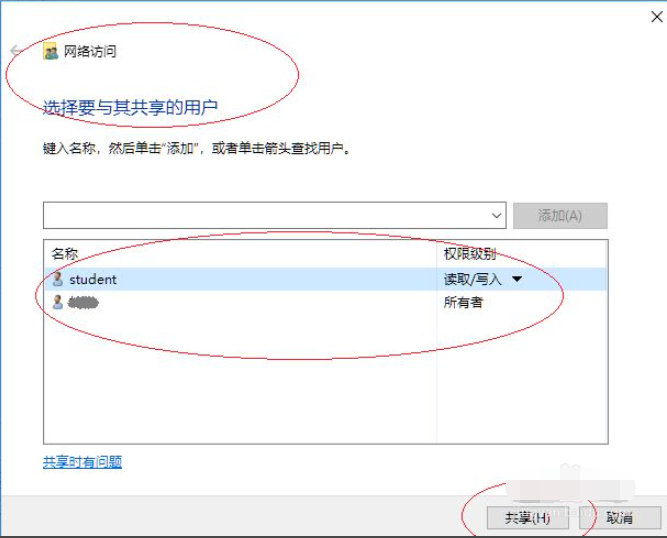
4、"选择要与其共享的用户"文本框输入"student"名称,点击"添加"按钮。
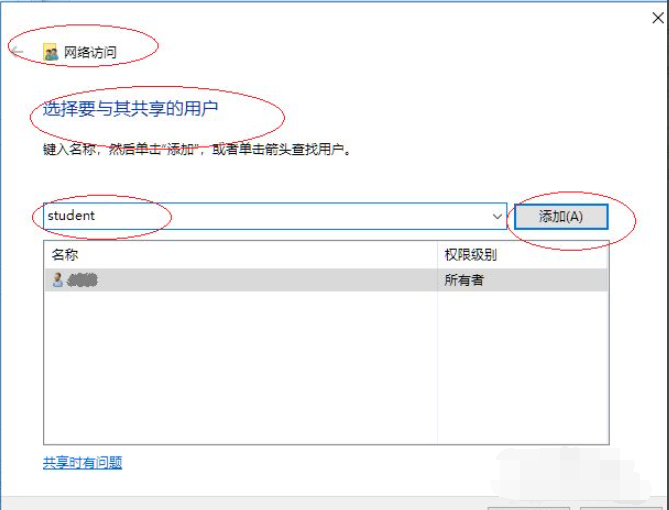
5、完成设置共享文件夹只允许指定用户访问的操作。
以上便是win10向特定用户共享文件的方法,有需要的小伙伴可以参照教程进行操作。


