Warning: Use of undefined constant title - assumed 'title' (this will throw an Error in a future version of PHP) in /data/www.zhuangjiba.com/web/e/data/tmp/tempnews8.php on line 170
win10怎么安装字体的步骤教程
装机吧
Warning: Use of undefined constant newstime - assumed 'newstime' (this will throw an Error in a future version of PHP) in /data/www.zhuangjiba.com/web/e/data/tmp/tempnews8.php on line 171
2021年09月07日 11:30:02
最近有朋友问小编window10怎么装字体,对于这个问题,相信还有很多朋友不太清楚。有时候我们想要在win10系统中安装自己喜欢的个性化字体,但是很多朋友不知道window10字体安装在哪里设置,今天小编来跟大家说说win10怎么安装字体的步骤教程,大家一起来看看吧。
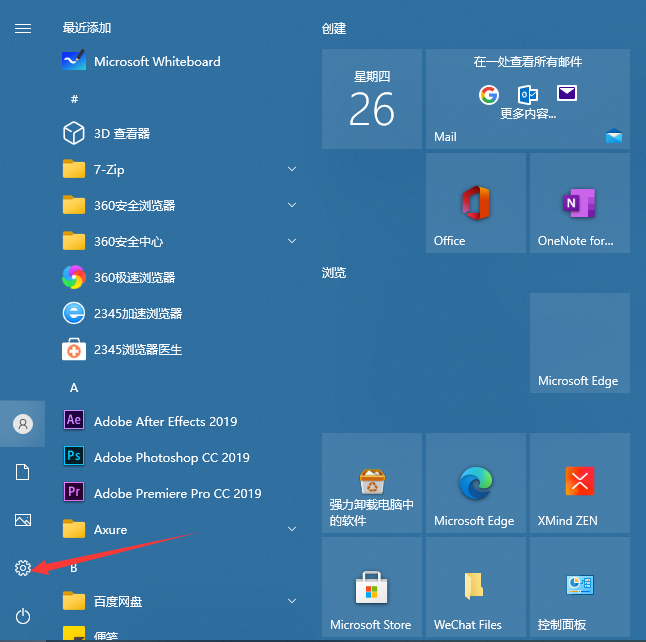
1、首先进入windows10系统,然后点击左下角的开始按钮,之后我们点击设置按钮。

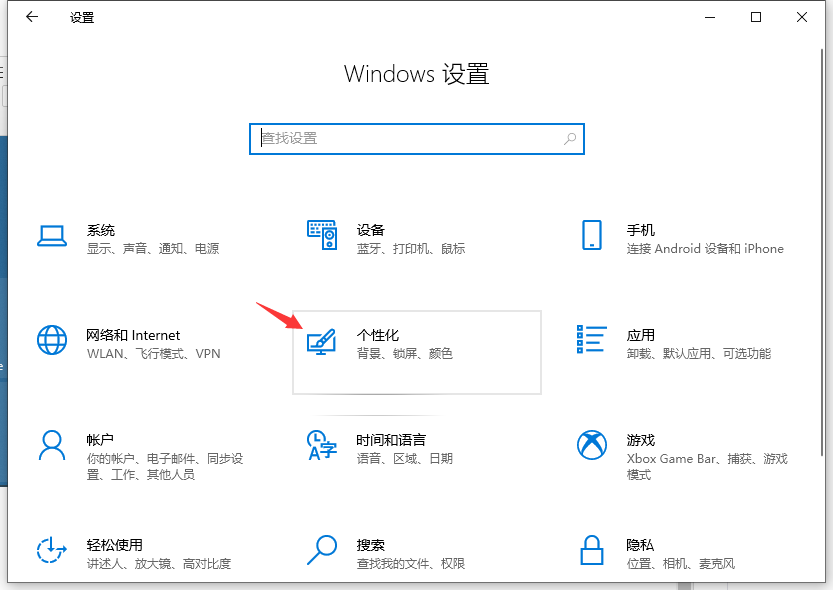
2、进入windows设置页面,点击个性化。
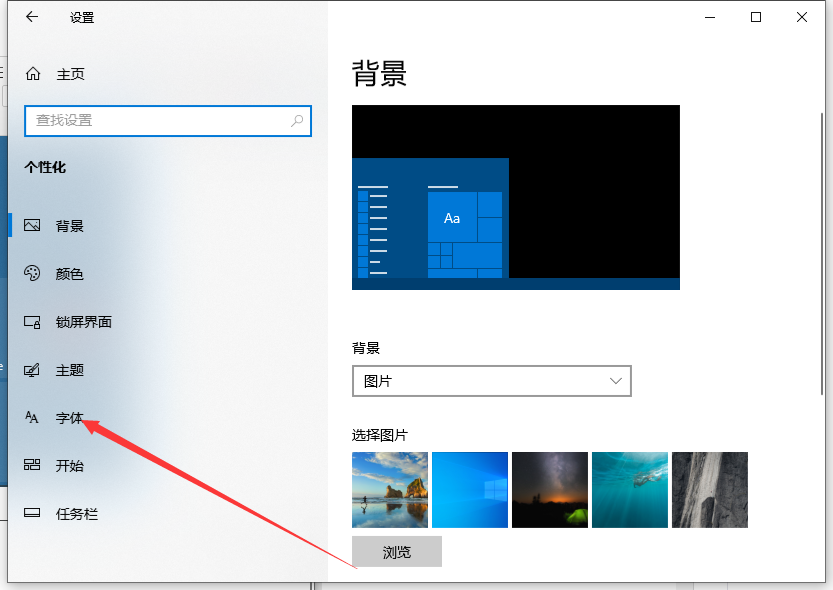
3、点击左边的字体,如图:
4、然后在右边我们可以看到可以直接拖拽字体以安装。
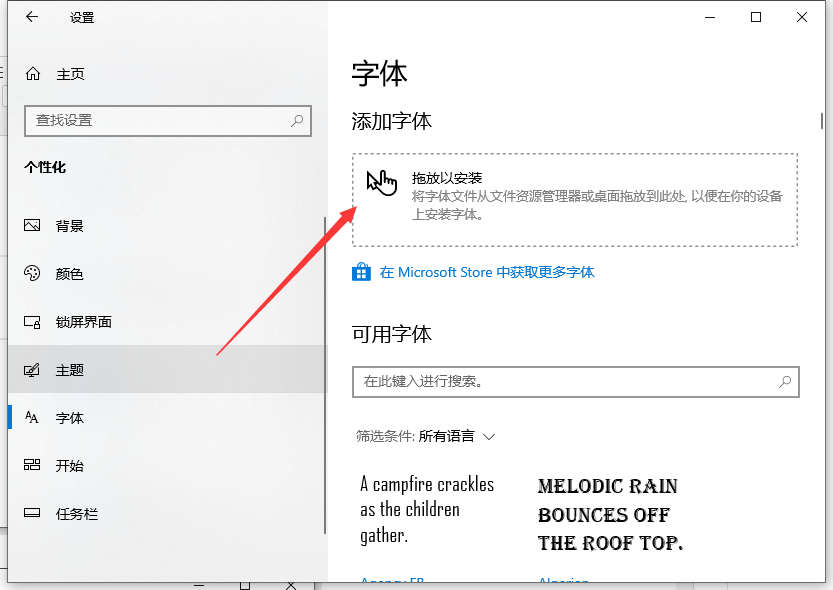
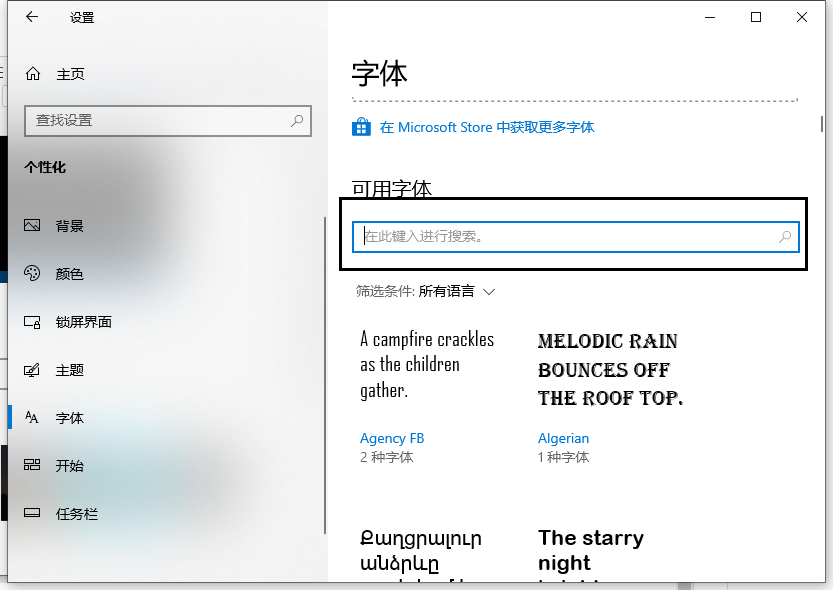
5、或可以点击下面的搜索字体。
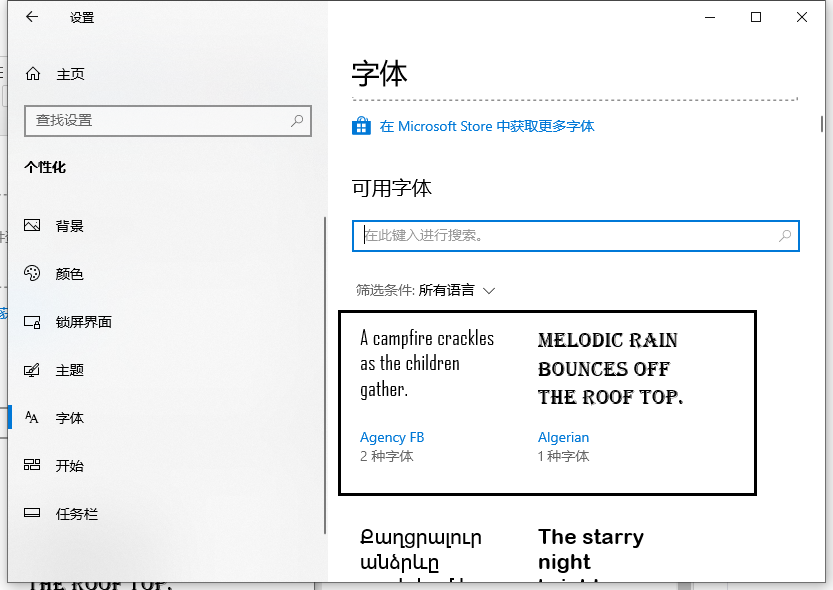
6、在往下面我们可以看到所有安装的字体。
以上就是win10怎么安装字体的步骤教程啦,希望能帮助到大家。


